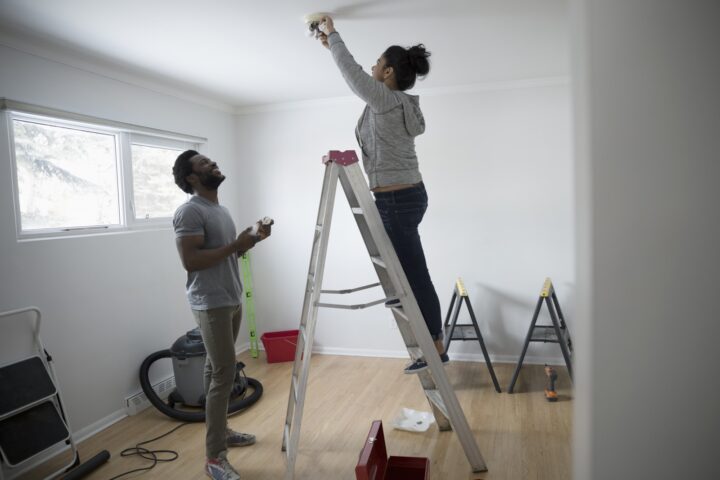
How to Change a Light Fixture
Forget the electrician — this big-impact DIY is one you can tackle all on your own.
Written by Zillow on December 20, 2016
Whether you're moving into a new house full of basic light fixtures or you're trying to inject your style with some statement lighting, it's great to know how to replace a light fixture.
This is a DIY that you can definitely do yourself, as long as you take the precautions needed to stay safe. Here's a step-by-step tutorial to help you add all kinds of stylish light fixtures around your home — without the need to call in a professional.
Supplies
- New light fixture
- Lightbulbs
- Screwdriver (Phillips and flathead)
- Electrical tape or wire caps
- Ladder
- Drop cloth or old towel
Step 1
The first thing you want to do is put an old towel or drop cloth under the light fixture you're trying to replace. This will ensure that any dust or drywall bits that fall from the ceiling will be easy to clean up after the project is over.
Step 2
This is the most important step of the entire project because it will help keep you safe.
Before doing anything with the existing light, turn off all electricity to this room. Although trained professionals can swap out a light fixture without turning off the electricity, it's extremely important for beginners to turn it off in order to stay safe.
This will take a trip to your circuit breaker box, where you can turn off the electricity to that room. Once you have confirmed that all electricity is off, it's safe to get started.
Step 3
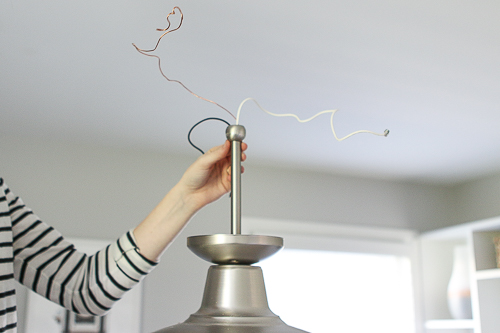
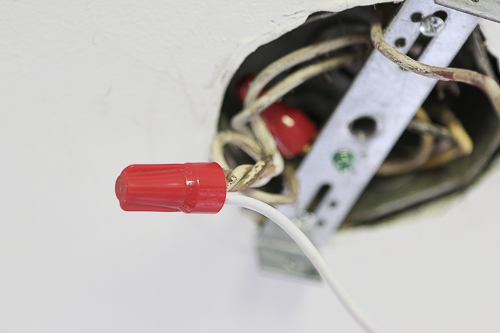
Every light fixture is a bit different depending on its style, but almost all of these fixtures will be screwed into the ceiling with a few screws. Find those screws and use a screwdriver to unscrew them. This will allow the fixture to detach from the ceiling.

Rookie tip: Even though you have unscrewed the fixture from the ceiling, the wires are still attached. You may need an extra set of hands to hold the fixture (especially if it's heavy) while you move onto detaching the wires.
Step 4
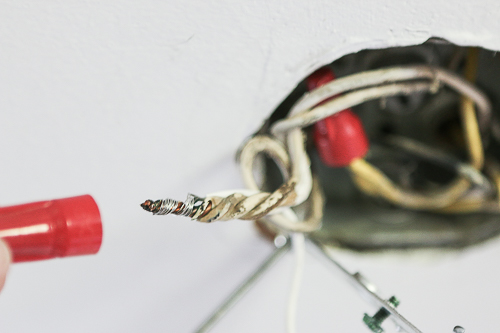
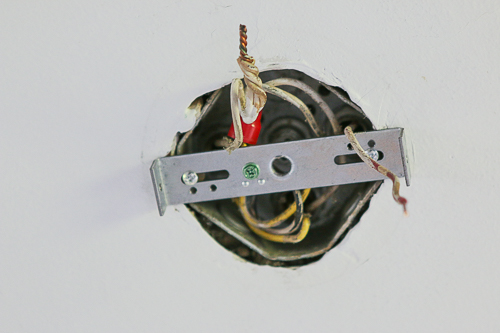
Carefully unscrew the mounting strap so that all of the wires have room to come loose from the electrical box, so they can eventually be detached from the fixture.

Step 5
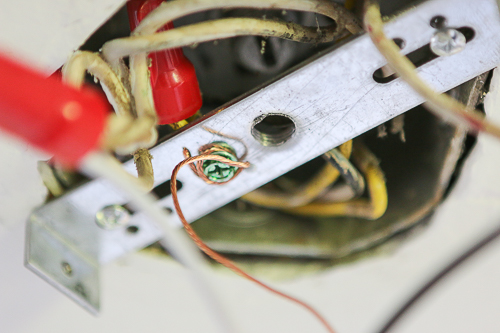
Note which color wires are paired up so you can reference these combinations when installing your new fixture. To help you remember, you may want to take a photo with your phone.
Once you're confident you know how each wire fits together, pull off the wire connectors (caps) and finish untwisting all of them. Although the electricity is not on at this point, it's good to get into the habit of not allowing any of the wires within the electrical box to touch each other throughout this process.
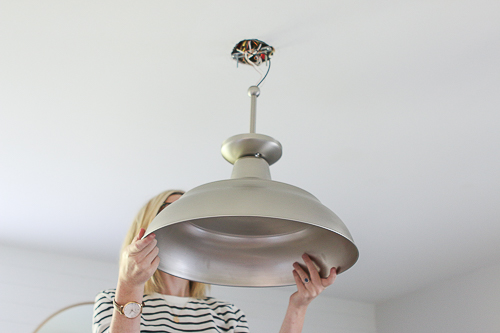
Step 6
Once the wires are all untwisted, the light fixture should be fully detached from the ceiling. At this point you can safely remove the old fixture and move on to the exciting part — adding one that you love!
Step 7
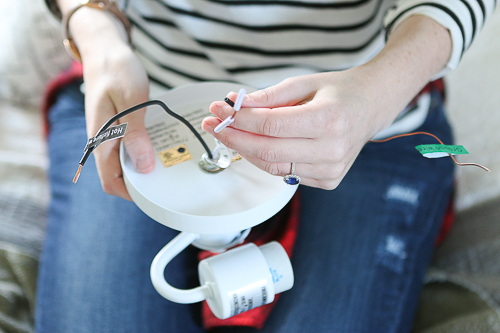
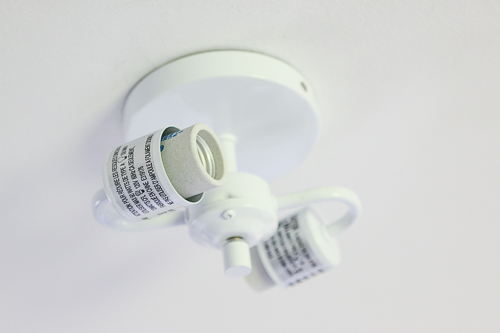
Your new light fixture probably came with a custom mounting strap (the metal bar looking thing), which can be installed the same way as the other one that you just removed.
Step 8
Tighten the mounting strap to the electrical box, but make sure that the hot wire (usually red) and the neutral wire (usually white) are still accessible so that you can attach the new fixture's wires before tucking them back up into the electrical box.
Step 9
Your new light fixture should make it easy on you by labeling each wire, but if not, here is the typical breakdown:
- White wire=neutral wire, connects with other neutral wire
- Black or red wire=hot wire, connects with black or red wire
- Copper wire=ground wire, connects to green ground screw
Step 10
Once you have identified which wires from the new fixture connect to each wire in the electrical box, all you have to do is carefully connect them.
Step 11
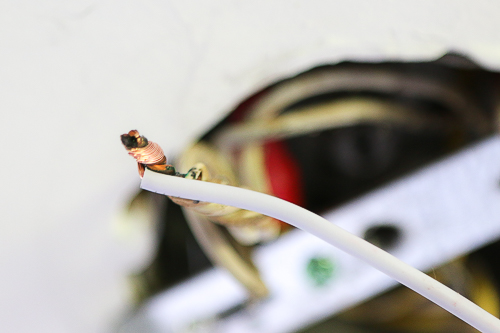
Wrap the exposed parts of both wires around each other to make sure the electricity will eventually run through this connection.
When you have thoroughly wrapped the wires together, twist on the wire connector. These connectors not only tighten that connection but also protect those wires from being exposed to other wires or metal surfaces. Add these connectors onto both connections in order to maintain safety when you turn on the electricity.
Step 12
Attach the copper ground wire to the green screw, making sure that it is wrapped tightly around the screw and that the screw is securely fastened to the mounting strap.
Step 13
Once you carefully feed the wires back behind the mounting strap, it's time to hang the new fixture.
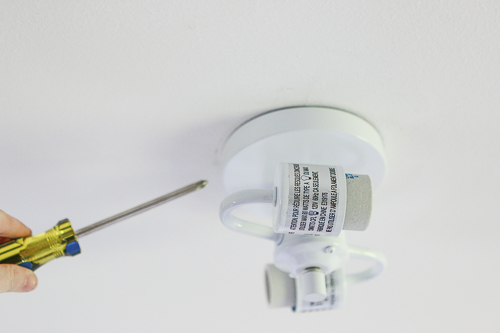
Step 14
Every fixture is slightly different depending on design, but most of them attach to the mounting strap with screws (provided with the fixture) and a screwdriver.
Step 15
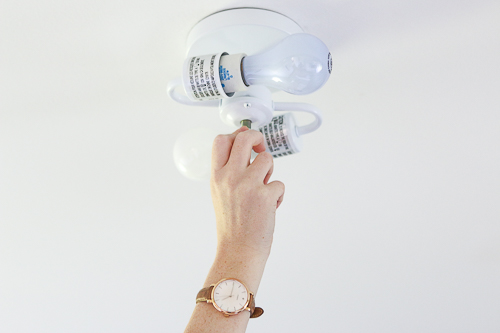
Lightly screw in the lightbulbs, making sure that you don't over tighten them to a point where they may break.
Step 16
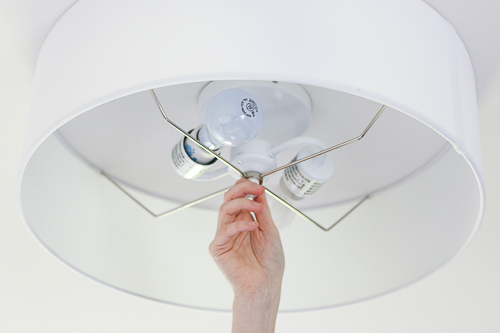
Depending on your light fixture's style, you may have to follow additional directions to complete the installation. In my case, I needed to attach a drum and then a cover on the bottom of the fixture.
Before you celebrate a job well done, you have one more very important step to complete.
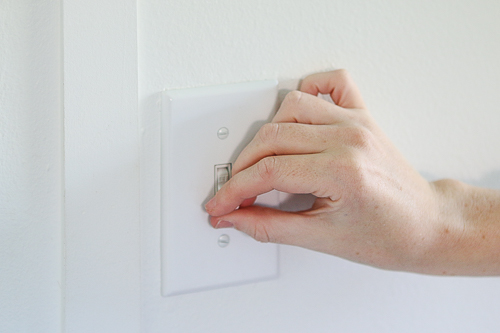
Step 17
Turn on the electricity at your circuit breaker box, flip the switch in the room and check to see that your light is working.
Assuming the light turned on, it's time to celebrate! You did it, and as far as we're concerned, you totally deserve time in the DIY spotlight for a job very well done.
Related:
Tags
Related Articles