Your Fall Home Maintenance Checklist: 14 Things to Do
Keep your home in shape and avoid unwanted tasks and headaches.
Written by Alexis Benveniste on September 6, 2023
It’s always a good time to work on home improvements, but the end of summer is a particularly good time to think about doing tasks that will protect and maintain your home as colder weather sets in. Perhaps your home inspector gave you a checklist of things to work on or maybe you’re just eager to make sure your home is running smoothly. In any case, this home maintenance guide and checklist will help you get it done.
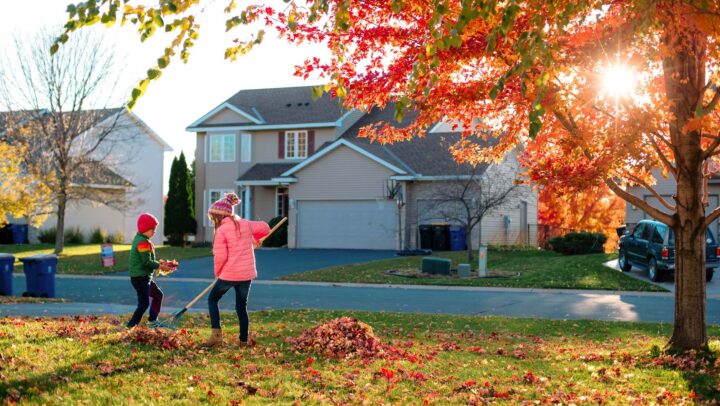
1. Rake the leaves
Effort level: Easy. This won’t take more than a few hours — tops!
When to do it: Do this when leaves start to build up in your yard, generally a month or two into the fall season.
Raking leaves is a controversial topic in the horticultural world. Many environmental experts say you should just leave them, but it all comes down to how many leaves you have in your yard.
If leaves are filling up your yard quickly, raking them will help keep your lawn healthy and prevent people from slipping. “Don’t wait until they get too deep,” Steven Lichtenfels, founder of Curb Appeal Sells Homes, a landscape and lighting company based out of Virginia, said. Lichtenfels recommends using a good plastic leaf rake that is designed for the job. “Raking leaves is primarily an aesthetic practice, and secondarily, a maintenance practice."
If leaves accumulate for an extended period, they could be harmful to your lawn. A thick layer of fallen leaves can deprive turf grass of oxygen and sunlight, which can weaken it and possibly kill it. If you don’t have a lot of leaves in your yard, however, you don’t need to remove them all.
Composting your leaves for use over the next growing season is a great way to use the leaves in your yard to your advantage, no matter how many you might have. “Leaves make fabulous mulch and great compost,” Lichtenfels said.
2. Plant grass seed
Effort level: Medium. Planting grass seed could take at least a few days because you’ll want to get the soil tested first. Try to plan ahead for this task.
When to do it: The beginning of fall, ideally 45 days before the first frost.
Planting grass seed requires a little research and work, but it’s worth it for the reward.
Like painting, planting grass seed is all about the preparation, Lichtenfels said. This includes knowing the best seed to select. Is the area sunny? Shady? Wet? Dry? Sandy? This is a good thing to look into and discuss with an expert. You can also order a soil test kit from your local county or state extension office or on Amazon. This can help you grow a green and healthy yard and allow new seeds to have the best life possible, Lichtenfels said.
Fall is the perfect time to check this task off of your list because cooler temperatures and tamer sun conditions are ideal for sowing grass seed. More specifically, if you live in the South, you can overseed your lawn with cool season grass so your yard will stay green all winter. Even if you live in the North, the fall season is a good time to start working on your lawn because it’s the optimal time for grass to grow healthy roots. Just be sure to put your seed out at least 45 days before you hit the first frost date in your area.
3. Clean and store outdoor furniture
Effort level: Easy. Try to make a fun day out of power washing, and have a friend or family member help you with storing. It’ll go by quickly.
When to do it: You don’t have to do this immediately, but it should be at the top of your list once temperatures start dropping.
If you live in a place where winters are too cold for sitting out on the patio, make sure you pack up your patio furniture before temperatures drop. Power wash the furniture to remove grime and mildew, and store it in your garage, an available shed or the basement until it’s time to take it out again for warmer weather.
For furniture that collects a little mildew — think plastic, vinyl or metal — during humid summer months, Lichtenfels recommends using a water and outdoor bleach solution with a 1:3 ratio for bleach to water. Put this solution in a hand sprayer, spray the furniture, let it sit and then power it off with a strong garden hose.
If you live in a temperate zone where a fire pit or chimenea is all you need to keep using your patio during the fall and winter seasons, don’t worry about storing your outdoor furniture. Instead, power wash the summertime grime from your each piece so they’re clean and ready for a new season of marshmallow roasting.
4. Turn off your outdoor water supply
Effort level: Relatively easy. This should only take a few minutes once you get the hang of it.
When to do it: Do this before the first freeze, perhaps towards the end of September or beginning of October, depending on the temperature where you live.
Turning off your water supplies, including your sprinkler system and any outdoor water valves, should be relatively simple, Lichtenfels said. Most water main valves are well-marked and obviously placed. This is a helpful thing to do, even if you have insulated pipes.
Once temperatures drop in the fall and winter, any water that’s left behind in exterior pipes and faucets can freeze and break the pipes, which could cause water to flood into your basement and result in a financial and logistical headache.
While you’re working on this, make sure you don’t neglect your garden hoses. Drain them and bring them to your basement or another temperature-controlled spot indoors. If you don’t, the residual water in the hoses can freeze and split the hose, which means you’ll have to buy new ones by the time spring rolls around.
5. Bring in plants that won’t survive the cold
Effort level: Easy. If you have a lot of plants, grab a friend or family member and make it a fun activity!
When to do it: Do this as soon as it starts to get cooler outside. You don’t want to put your plants at risk.
While some plants are freeze-proof, others just aren’t meant to survive colder temperatures. In a best-case scenario, you can move the plants inside and put them under a special grow light to keep them happy and healthy. In a worst-case scenario, however, you might have to get rid of the plants completely.
Lichtenfels also recommends checking to see if any of your plants are root-bound in their pots before bringing them inside. “It’s easier to repot in the proper-sized container when they are outside, and your plants will thank you by being healthier indoors over the winter,” he said.
Make sure you don’t overwater your plants before you bring them inside. Instead, water them after they’ve had 2-3 days to assimilate to your indoor environment. Then, water them gently. Keep in mind that moving plants indoors sometimes means they will be getting less light. Try to keep the plants in a consistent location for sun when they are moved indoors, Lichtenfels recommends.
6. Touch up exterior paint
Effort level: Medium to hard. You’ll likely want to hire a professional for this, which takes research, time and money.
When to do it: Aim to do this before it gets too cold so the work is getting done when it’s still a comfortable temperature outside.
“Like grass seed, painting is all about the preparation,” Lichtenfels said. Do some research on your own, and try to decide if you want to take this on as a DIY project or hire a painter. Whether the job is done by you or a professional, this task requires careful attention to detail because you have to find and fix every spot that needs to be touched up.
There are some things you should take into consideration if you decide to take on this project solo. First, scan the exterior of your house and try to identify the spots that need to be painted. Once you’ve done that, make sure you have a smooth surface to work on. If there’s any paint that’s flaking or peeling, remove it with sandpaper. Then, before you start painting, make sure the surface is clean so the paint doesn’t pick up any dirt, mold, pollen or other unwanted particles. Once it’s clean, apply primer, let it dry, and then paint the surface.
7. Check on and maintain outdoor lighting
Effort level: Low to medium, depending on how many lights you have and how high up they are.
When to do it: Aim for September, when the days are still long and it’s still light into the evening.
When it gets darker earlier in the day, you’ll want working outdoor lights. Consider any pathways in your front and backyard as well as patio and porch lighting. Walkways are inefficient if they aren't lit correctly, and you want to make sure trick-or-treaters can see their paths when Halloween rolls around in October.
Before diving into this project, do a survey of your lights first. Check all of the outdoor areas that have lighting and team up with a friend or family member who can turn the switches on and off for you while you do a run-through. You’ll have the best luck — and be the most productive — if you do this while it’s dark outside and easy to see which lights are out. Once you have a list of lightbulbs that need to be changed, go to your local hardware store with the burnt out bulb and ask for replacements. This will help you ensure that you pick out the right ones. Aim to replace your bulbs in daylight so you can see the sockets and make sure everything is installed correctly.
It’s a good idea to maintain and use a high-quality automatic timer on your outdoor lighting system, Lichtenfels said. It will help you get the most out of your system and help your lighting system be more energy-efficient.
8. Clean your gutters
Effort level: Medium. This requires using a ladder, and you’ll likely want to hire a professional, which means you’ll also need to set aside time for research.
When to do it: Clean your gutters towards the end of fall when the leaves have accumulated. If you have a lot of trees, you may need to do it a few times during the season.
As fall comes to an end, after trees have shed all or most of their leaves, it’s important to remember to clean your gutters. Yes, we know, this is the most dreaded of homeowner tasks, but falling leaves are inevitable and can clog your gutters, which can result in mold, bug infestations and roof issues. Even if you don’t have trees on your property, it’s important to clean your gutters because unwanted stuff can still blow into them during storms.
Plus, if your gutters are clogged, they won’t funnel rainwater away from your house as they’re designed to do. Cleaning them out will prevent water from overflowing and damaging your home’s foundation, exterior or even the interior.
This isn’t a fun job, so it might be worth it to treat yourself and hire a pro to do this task.
9. Clean your dryer vent
Effort level: Low. This is a relatively easy task.
When to do it: At your convenience. To optimize your dryer for the back-to-school season, do it at the beginning of fall.
There are really only five steps to consider when you’re cleaning your dryer vent, and while that may sound like a lot, it’s pretty straightforward and manageable.
Start by finding the vent — which is at the back of the dryer — and then disconnect the dryer. Next, with gloves on to protect your hands, vacuum out the vent to get it clean. Once that’s done, brush out the vent to thoroughly clean it. When you’re done, reconnect the dryer and remove the lint trap filter and take out any lint that might have built up in an effort to keep it clean moving forward.
This is a great task for fall as back-to-school season ramps up and laundry loads become a more regular part of daily life. The National Fire Protection Association recommends cleaning your dryer vent at least once a year to prevent fires.
10. Repair cracks in driveways, walkways and the foundation
Effort level: Medium. This may require professional help if you don’t feel comfortable doing this task on your own.
When to do it: Do this before it gets cold outside. Aim for September or early October.
Cracks are easy to ignore when you get used to seeing them around your home, but fixing them is an important task that shouldn’t be delayed.
With fewer moments of grueling sunshine and no concern for freezing (yet), fall is the perfect time to deal with cracks you find in and around your home. Cracks in driveways, walkways and the foundation of your home can potentially worsen in the winter when water is likely to seep into them and freeze, causing them to expand. To get ahead of colder temperatures, use an asphalt or concrete patch compound to fill in all of the cracks.
11. Clean your fireplace and chimney
Effort level: Medium. You’ll want to hire a professional to do this task.
When to do it: Regularly, but include this on your fall list since you’ll likely be using the fireplace more often.
While you’re thinking about getting ready for cozy winter nights by the fire, look into hiring a professional chimney sweep to inspect and clean your chimney. They’ll clean creosote — the flammable residue from smoke, gasses and particles from last winter’s fires — from the chimney and look for any obstructions like leaves, sticks or debris that will prevent harmful fumes from venting properly out of the chimney. They’ll also look for any damage to the chimney which could cause it to malfunction. Don’t try to take on this job as a DIY project. Despite what you read on the internet about this being easy, a pro will be able to spot issues you’d otherwise miss.
This task should be paired with checking your fire extinguishers. The National Fire Protection Association recommends checking your extinguishers once a month to make sure they’re full and not installed in locations that are prone to rust, impact or tampering.
12. Prep your heating system
Effort level: Medium. Find a professional who can do this task.
When to do it: Prep your heating systems before the temperatures drop and you desperately need warmth.
Get your heating system checked out by a licensed HVAC tech. It will run better and last longer if you have it serviced twice a year. Plus, you don’t want to head inside on the first night the temperatures dip into the 50s only to find out your heat isn’t working.
Got a radiator? If it’s a steam radiator, make sure you take time to clear its air hole with a small wire or needle. Hot water radiators need to be bled, which involves opening a valve at the top of the unit and releasing trapped air and water.
Is draining a radiator or opening pin-hole-sized air vents out of your DIY comfort zone? Totally understandable. In that case, call a radiator specialist who can make sure your unit is ready for the late fall and early winter temperatures.
Pro tip: You’ll want to consider reversing your ceiling fans to turn clockwise. This will recirculate heated air, rather than blow cool air as the temperature dips.
13. Check batteries in smoke and carbon monoxide detectors
Effort level: Easy. You may have to grab a step ladder, but this won’t take too long.
When to do it: You should be doing this regularly. Aim to check the batteries at your earliest convenience.
If you do only check one fall home maintenance task off of your list, make sure it’s this one. Since you’re entering fireplace and space heater season, it’s a good time to make sure your smoke and carbon monoxide detectors are working properly. Your detectors are your first line of defense if your fireplace isn’t venting correctly or you have a kerosene heater, gas heater or wood stove that’s malfunctioning and leaking harmful carbon monoxide into your home.
Grab a ladder, ask someone to spot you, and check all of the detectors in your house. Replace any batteries that are dead or missing, and test the devices to make sure everything is working properly in case an emergency arises.
14. Re-caulk window and door casings
Effort level: Medium. You might be okay with doing this as a DIY project, but it’s totally understandable if you want to hire a pro.
When to do it: Aim to do this before it gets too cold outside. Get it done in September or October.
Air leaks from windows and doors can let cold air inside and release a lot of treasured and expensive heated air outside. Sealing your windows and doors with caulk as part of your fall home maintenance to-do list can save you money on your heating bills and ensure that the temperature in your home is exactly what you want it to be.
While this is a super simple fix you can likely do yourself, it’s totally understandable if you’re more comfortable with hiring a professional.
Related Articles