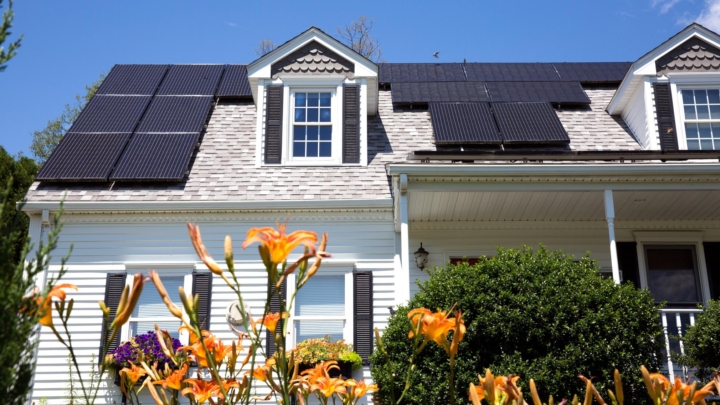
Sealing and Insulating Your Ductwork
Who doesn’t want to save money on utility bills? A good place to start is by insulating your ducts.
Written by Zillow on July 10, 2019
Insulation isn’t free, but as the old saying goes, sometimes you have to spend some to make some. When it comes to adding duct insulation, your monthly savings in utility bills will soon cover the costs, especially if you install the insulation yourself.
The problem with uninsulated ducts
You need insulation – even around your ducts – no matter where you live. Insulation isn’t only about keeping heat in. It also keeps the heat out of the home (or duct).
In the average home, around 20% to 30% of the heated or cooled air flowing through the ducts is lost to leaks and uninsulated surfaces, according to the Department of Energy. The result is higher utility bills, wear and tear on the heating and cooling system, and difficulty maintaining the temperature inside your home. Additionally, uninsulated ducts can accumulate condensation, which eventually leads to rust. Once the ducts start rusting, you face having to install new ducts.
Evaluating your ducts
First, consider the duct location. The greater the temperature extreme between the air inside the duct and the air surrounding the ductwork, the greater your need for duct insulation.
Unfortunately, so many houses — especially newer homes — end up with ductwork running through the attic. Unheated basements, crawl spaces under the home and even garages are also unconditioned (neither heated nor cooled) runs for ductwork.
If, on the other hand, your ducts run across the ceiling of a heated basement or inside well-insulated walls and ceilings, your need for duct insulation is minimal. However, if the ducts have a lot of leaks, the air that makes it to your rooms will not be as warm or as cool as intended. So duct loss matters no matter what.
Then there’s the duct material itself. Most heating and cooling ducts are metal. These are the bulky, gray box-shaped ducts so common everywhere. Sometimes metal ducts are lined with duct liner, a 1-inch-thick fiberglass board that insulates the interior of the duct, rather than the exterior. Duct liner isn’t generally a DIY installation, and if your ducts already have liner, you don’t need to insulate the exterior.
Duct board, much like the duct liner, is also a fiberglass product. Made from 1- to 2-inch-thick sheets of rigid glass fiber and coated with an aluminum laminate for a moisture/air barrier, duct board comes in sections that fit together like metal ducts. Duct board’s advantage is that it is already insulated, eliminating the need for further work, as long as it is structurally sound.
Another product, known as flex duct, is a round framework of wires coated with fiberglass and encased in either foil or plastic to resist moisture and air leakage. Although flexible ducts don’t require further insulation, they are vulnerable to damage, especially punctures. Since they are generally used for short runs, when working on the remainder of your ductwork, check any flex ducts as well.
Types of duct insulation
Once you determine that your duct needs insulation, consider the type of insulation you want. To insulate the exterior, you have a choice between sleeve-style insulation and blanket wraps, which literally wrap around the ductwork.
To install sleeves, you must either disassemble the ductwork and slide it on before reassembling the ducts or — as many homeowners find themselves doing — slit it and wrap it around like the blanket-style material. In the end, it’s probably best to buy the blanket insulation.
- Duct insulation sleeves: Come in pre-measured lengths. They may have an adhesive strip to make the installation a little easier. Common sleeve materials include foam, bubble wrap and fiberglass, all typically featuring a foil-like outer surface to provide air and moisture resistance. To fit your ducts, simply cut the sleeve to length with a sharp pair of scissors. Like any other insulation, use additional layers to provide better insulation power.
- Foil-backed self-adhesive foam duct insulation: Installs easily and wraps around irregular ductwork areas well. Most brands come in rolls a foot in width and several feet long. While fairly thin, it works well to dampen sound and can be combined with other forms to increase the insulation rating. Best of all, you eliminate the fiberglass in that area of your home. However, never apply just any foam to your ductwork — only formulas designed for the application. Many foam products are highly flammable and toxic when burning.
- Fiberglass and cotton duct insulation: This type typically includes an aluminum foil backing to repel moisture invasion or air leaks. Available in a variety of thicknesses, rolls are usually a foot wide and several feet long. It’s often a cheaper form of insulation, though the end value relies on installing it properly. Fiberglass and cotton are easily cut to size.
- Foil-backed bubble wrap: May not deliver the insulation power and vapor barrier performance you expect if you opt for a cheaper brand. Another drawback is that as a reflective insulation, you must provide an air gap between the duct and insulation itself. Special spacers are purchased to ensure this gap. Alternatively, you can cut squares of the insulation and line the length of the duct with these squares, tape or glue them in place, then install the insulation. Use enough to ensure the length of outer insulation doesn’t touch the duct anywhere. This is quite a hassle, so think carefully before choosing this duct insulation style.
As new and innovative products arise continually, these are by no means the only types of duct insulation available, nor will they remain the main types. When evaluating any type of duct insulation, make note of the installation method, the drawbacks and the advantages, as well as the insulation power, known as the R-value. Talk to others about what works for them and shop around before choosing any insulation for any part of your home.
Considering your insulation R-value
More important than the type of insulation (provided it is installed properly) is the R-value of the insulation you use. R-value is the measure of the ability of the insulation to prevent heat from either penetrating or escaping the object insulated. The higher the R-value (literally meaning resistance value), the better the insulation works. However, there is a ceiling on the effective R-value because, at a certain level, the cost of the material becomes greater than any additional savings.
Before selecting your duct insulation, determine the optimum R-value for your region. In general, the colder your climate, the higher the R-value you will need. Even then, different areas of the home may require greater or lesser insulating power. As a rule of thumb, expect to install a minimum of R-5 material. To be precise, consult the Department of Energy’s Duct Insulation R-value Chart.
When selecting your duct insulation, use the R-value you require to determine what product — or combination of products — you need. Use more than one layer if a single layer won’t give you the value you desire.
Testing and sealing: the critical first steps
Well-meaning homeowners commonly make a couple mistakes when insulating their ducts. First, some don’t realize that you can’t use paper-backed fiberglass insulation. Perhaps the most commonly used insulation for joists and walls, the fiberglass itself is fine, but it doesn’t take much to get the paper hot enough to burn. Never use anything not specifically intended for use with HVAC ductwork.
The second mistake is even more common: DIYers often do not understand that they must seal the ducts first. Failing to perform this basic step will undermine your insulating efforts. No matter how well you install the insulation or how high the R-value, even with the moisture/air barrier attached to the exterior of the insulation, it won’t prevent air and temperature loss if your ducts aren’t structurally sound.
Some ducts, depending on the material and the location, are more vulnerable than others when it comes to air loss, but any duct has the potential to leak. With age, house settling, rust from moisture, animal intrusion and a variety of other hazards, your ducts may obtain anything from pinholes to gaping voids, loose and leaking connections between pieces, or even potentially missing ducts. Your joists or wall studs may actually form the “duct” run if a portion of your HVAC ductwork is missing — or the air may simply pour out to the exterior.
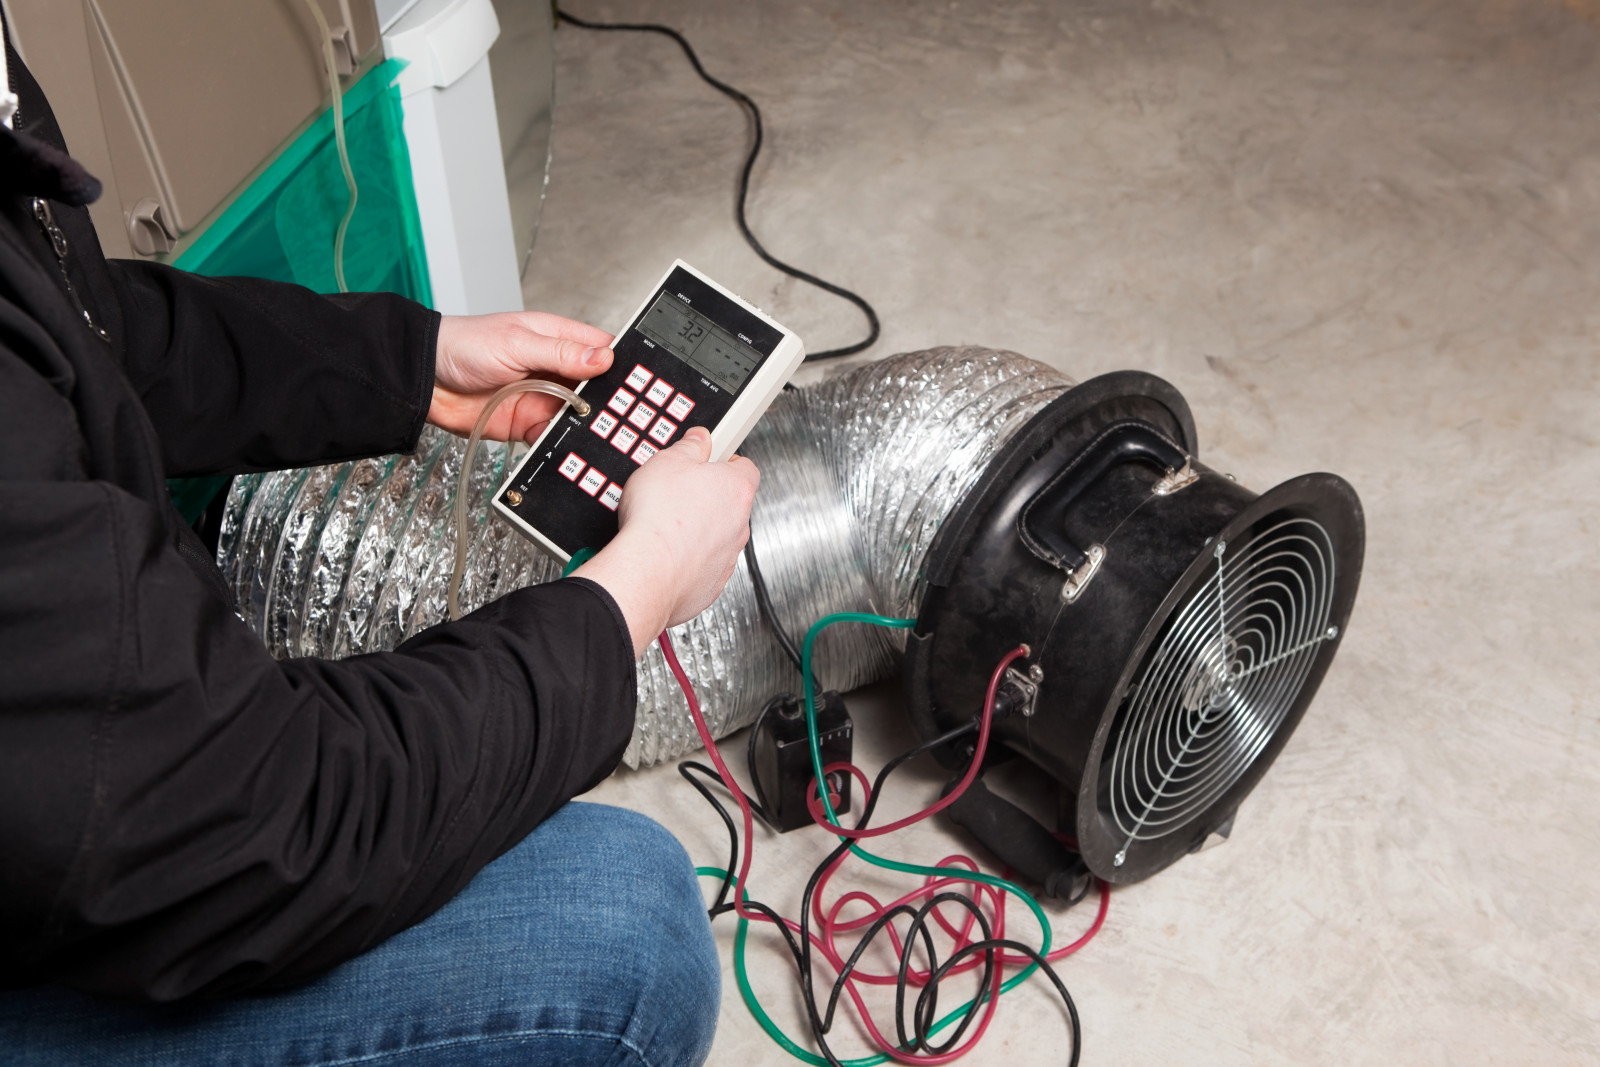
To ensure you aren’t wasting your time, money and insulation, have a duct leak test conducted before sealing the ducts. A professional duct leak test identifies leaks inside your home’s ducts. Generally called a duct blower door test, the technician seals the air intake and outlet registers before blowing air through the system. With the aid of specialized tools, the technician can determine the amount of air leaking from your ductwork and where it’s occurring. Common problem areas include around the registers and vents, where they enter the room they service, and at each duct joint (connection).
Having your ducts tested adds to your expense, of course, with most professional inspections running $100 to $200. Only a professional has the equipment and knowledge required, so it’s really not a DIY-friendly task. Still, spending the money will end up paying off in the end.
Also, local building codes are gradually beginning to require that new houses have a whole-house and duct blower door test performed. How does this apply to you? At any point that you make any upgrade involving your ducts that requires a building permit, you will have to follow the current code. It’s also a good selling point if you ever put your house on the market.
To find a professional to perform the work, try your local utility company, HVAC service company or specialized testing companies. The Department of Energy provides excellent tips on choosing your technician. Also look for energy efficiency credits that may be available through the utility company or the state or federal government for testing and insulating your ducts. This may offset your costs significantly.
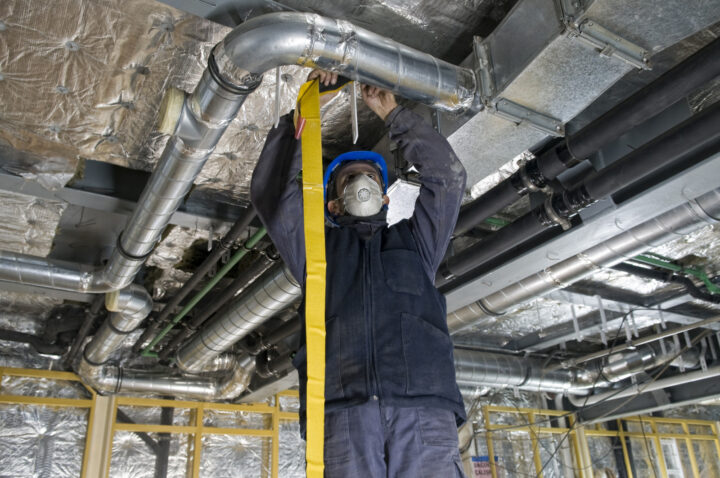
Sealing and insulating: getting down to work
Some duct testing companies will seal the ducts for you, eliminating leaks and holes, as either part of the service or for an additional fee. Do what you’re comfortable with — if you feel confident about doing the sealing yourself, it will be messy.
If you decide to proceed without testing your ducts, perform a thorough examination, looking for any rust, holes, severely damaged pieces, loose connections or missing portions, starting at the furnace and air unit and working back to the very last register in the home. Mark problem areas with a marker or chalk. After the inspection, seal your ducts, keeping a few tips in mind:
- Start with clean, dry ducts. You don’t have to wash them, but wiping them with a damp cloth or whisking them with a broom and making sure the surface is dry will help the sealant-to-duct bond.
- Select your desired sealant, or use a combination of products as appropriate. Mastic is the most common sealant, but specially formulated duct sealant, in cans or caulk tubes, is also available. Silicone caulk will work in small areas.
- Choose a tape to use with the sealant when necessary. Special foil tapes work well, or select a mastic tape. Never use duct tape — it will not stick for long. In general, only use the tape by itself when you have no other choice. Any tape tends to degrade or peel away with age, while mastic hardens to a stiff, durable surface. When the tape is used with the mastic, however, it works very well.
- Spread duct mastic or sealant across the duct seams, joints and very small holes. Follow the product instructions for precise application instructions.
- Apply mastic in a layer about as thick as a nickel. An even, generous layer helps ensure your duct will never leak again. Use a stiff-bristled paintbrush or your fingers to spread the sealant. Wear rubber gloves to limit skin contact.
- Wear old clothes during application. Mastic and other products may not wash out.
- Tape cracks or holes larger than 1/8-inch diameter with the tape selected. Cover with the mastic to create a durable duct patch.
- Seal all the duct joints, holes and connections near the furnace. Seal the duct-to-register connection as well. Wherever there’s a joint or intrusion, use sealant. Keep in mind that it is better to over-seal than to have a remaining leak.
- Work from the furnace or air unit back to the last (farthest) register in the home. This allows you to prioritize your sealing efforts, ensuring the most important areas are covered. Holes, leaks and gaps closer to the HVAC unit encounter higher air pressure than those farther away, so your greatest savings and increase in efficiency will come from sealing well at and near the unit. Leaks also tend to be common close to the blower fan and where the ductwork emerges from the furnace.
After the sealant is dry, the final step is insulating the ducts. The process is simple if you use a wrap-style insulation product. Before beginning, read the product instructions and follow wherever they deviate from general duct insulation guidelines:
- Measure and cut your duct insulation a little large to allow overlap at every seam, both lengthwise and on the ends.
- Wrap the insulation around the duct, allowing the beginning edge to ride up slightly over the previous piece.
- Ensure the material is turned the proper way; the vapor barrier should face out, and the fiberglass or other material should be against the duct.
- First staple, if possible, then tape each seam, both lengthwise and between pieces. When overlapped 2 to 3 inches and secured with tape, each joint should be very secure and leak-free. Use a pressure-sensitive vapor retarder tape designed for ductwork.
- Tape any punctures in the insulation’s vapor barrier to prevent leaks.
- Avoid compressing the insulation. Most insulation relies upon the air space between its fibers to deliver the R-value promised. When insulation is squeezed, flattened or compressed, its R-value drops tremendously. Some compression is unavoidable, such as around bends.
Once your ducts are sealed and insulated, you can have a technician retest your ductwork if you desire. Some companies may offer the “after” test for free. Following these guidelines and installing everything properly guarantees that your second test will blow the first away — pun intended — but better yet, your utility bills will show the difference.
Related Articles